Wednesday 13 June 2018

How to Add a Pinterest Hover Button to your Blogger Images

Update September 20, 2016: The developer of the code mentioned in this blog article updated the code on September 18. If your hover buttons recently stopped working, make sure you update your blog template with the updated code.

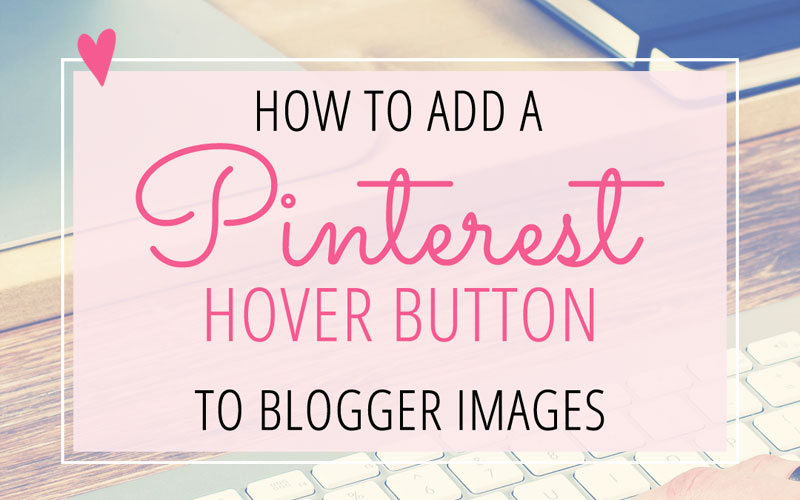
Make it easy for your blog visitors to Pin your images — and add a Pinterest hover button to your Blogger images! What's a "hover button"? It's a button that appears when you put your mouse  over an image. Go ahead and test it out on this image below. Clicking on the pink Pinterest button that appears in the middle of the image will allow you to pin this image to your Pinterest boards.

How to Add a Pinterest Hover Button to Blogger Images

Here are the instructions for Blogger blogs. (This doesn't work on Blogger's Dynamic Views templates or on mobile templates.) For self-hosted WordPress blogs (aka wordpress.org blogs), see this post: How to Add a Pinterest Hover Button to your WordPress Images.

NOTE: This requires editing your Blogger template. Before proceeding with the instructions below, I recommend that you backup your Blogger template first!

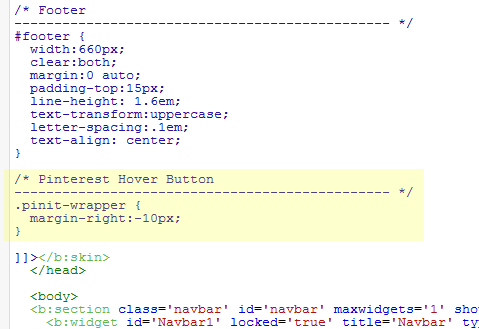
  1. In your Blogger Dashboard click on Template and then Edit HTML.
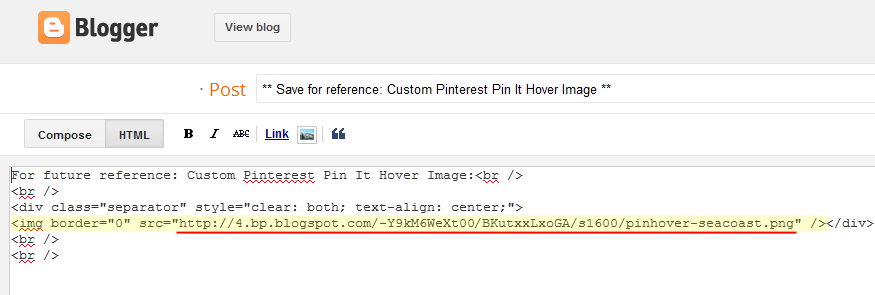
  2. Scroll down to the bottom of the code and find this line:   
  3. Copy this code from BloggerSentral and paste it into your template code right above the  code.
  4. Click the "Save Template" button.
  5. Click the "Close" button.

Now view one of your blog posts and you should see a red Pin It button appear on top of your images when you put your mouse pointer over an image. You can call it quits now — or we can customize things a bit…

USE A CUSTOM PIN IT IMAGE:

Download a Pinterest Icon to your computer or create your own. (You can get my Free Pinterest Buttons for your Blog here – and here – and here!) Then upload your image to an external website such as Photobucket (and skip to step #5 below) – or you can upload it right to your Blogger blog:

  1. Create a new post.
  2. Add your Pinterest icon to the post.
  3. Once you see the image in your post, click the HTML button (top left corner). Now you will see the HTML code of the post. Look for the image code. It will start with  and will include src= followed by a URL in quotes, similar to the yellow highlighted line shown in the image below. (Click the image to view a larger version of it.) Copy the URL that is in the quotes after src= (see the red underlined text in the image below); this is the URL of your image.
    Custom Image in Blogger

    Using a Custom Image for Your Pinterest Hover Image in Blogger

  4. Do not publish this post. The sole purpose of this new post is to store your image on Blogger. I recommend saving the post as a draft just in case you forget the URL. However, you can delete this post if you want to, since the image will still stay on Blogger's web server.
  5. Now go back to your template's HTML code (Template > Edit HTML) and find this code: 
    var bs_pinButtonURL = "https://blogger.googleusercontent.com/img/b/R29vZ2xl/AVvXsEgb3aJU0qdFsLsX89d8uwMjZUWDbRL6767W4xCOWpeZKWB0l9g3wQIxOXaPByOHaK0wKGftBr_sYOEnQN9HjxuN2sJbNlF9ifOCp53bd-w3OvRCZz3CRNVxu8asUXp79X2vnpJ0Pn1ESxFr/s1600/pinterestx1_72.png"; 
    and replace the URL in the quotes (in red above) with the URL of your image.
  6. Click the "Save Template" button.
  7. Click the "Close" button.

 CHANGE THE POSITION OF THE PIN IT BUTTON:

By default the Pin In button will appear in the center of your image. If you prefer that it appears in the corner of your images instead, you can easily do that. Simply find this line of code in your template's HTML code (Template > Edit HTML)
var bs_pinButtonPos = "center"; 
and replace "center" with one of these positions:

  • topleft
  • topright
  • bottomleft
  • bottomright

If you want to offset the Pinterest Button from the corner of your image so there is a little space between the button and the corner of the image, you can add some CSS code to the section of your template (Template > Edit HTML)
.pinit-wrapper margin:-10px; 
(The negative value for the margin pushes the button inwards.) For example, see the yellow highlighted code in the image below:

Adding Space Around Your Pinterest Hover Image in the Corner

No comments:

Post a Comment